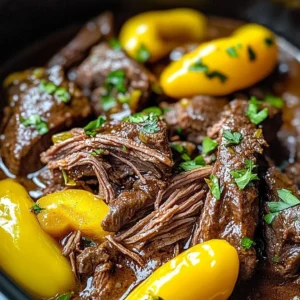

Reese’s Peanut Butter Earthquake is an indulgent dessert that combines the rich, classic flavors of chocolate cake with a decadent peanut butter twist. This delightful treat is sure to evoke feelings of nostalgia and warmth, making it an easy choice for family gatherings and special occasions. With its chocolatey goodness and creamy peanut butter filling, this dish is as comforting as it is delicious. What makes it even better is that this recipe is a breeze to follow, thanks to its step-by-step instructions. Let’s delve into crafting this delightful treat!
Ingredients
To create the perfect Reese’s Peanut Butter Earthquake, you’ll need the following ingredients:
- 1 box chocolate cake mix: The foundation of this dish, with its rich cocoa flavor.
- 3 large eggs: Essential for binding and adding moisture.
- 1/2 cup oil: Provides the cake with a tender crumb.
- 1 cup water: Helps in achieving the right cake batter consistency.
- 120 g melted butter: Adds a luxurious richness to the overall flavor profile.
- 225 g softened cream cheese: Infuses the dish with a creamy texture and tangy taste.
- 125 g creamy peanut butter: The star of the show, adding a nutty,, velvety smooth flavor.
- 2.5 ml vanilla extract: Enhances the sweet aromas in the dish.
- 500 g powdered sugar: Sweetens the cream cheese mixture, giving it the perfect consistency.
- 90 g semi-sweet chocolate chips: Contributes delightful bursts of chocolatey goodness.
- 180 g mini peanut butter cups, halved: Provides delightful pockets of peanut butter goodness and a delightful crunch.
Step-by-Step Directions

Preheat your oven to 175°C (350°F) and lightly grease a 23 x 33 cm glass baking dish. This helps prevent the cake from sticking and ensures easy removal later.
In a large mixing bowl, mix the chocolate cake batter according to package instructions, incorporating the specified water, oil, and eggs. Pour evenly into the prepared baking dish, making sure it’s smooth and well-distributed.
In another bowl, beat together the softened cream cheese and melted butter until smooth. This creates a rich mixture that is essential for the dessert’s creamy peanut butter layer. Add the creamy peanut butter and vanilla extract, mixing until combined. Gradually blend in powdered sugar until the mixture is thick and creamy, resembling a luxurious frosting.
Distribute spoonfuls of the peanut butter cream mixture across the surface of the chocolate batter, leaving swirls visible. This step adds beautiful marbling that enhances both presentation and flavor.
Scatter the semi-sweet chocolate chips and halved mini peanut butter cups over the top. Feel free to press some into the batter gently for an inviting look and to ensure they stay well incorporated while baking.
Bake for 45 to 55 minutes, or until edges are set and the top is cracked. Allow to cool slightly before serving warm, or cool completely for neat slices. Either way, the warm and inviting aroma wafting from your kitchen will surely beckon everyone nearby!
Tips & Tricks
For an even richer flavor, consider using homemade chocolate cake rather than a boxed mix. Moreover, if you prefer a little more crunch, add some chopped peanuts to the top before baking, or even swirl in some extra creamy peanut butter for a more indulgent experience. Always err on the side of slightly underbaking if you enjoy a fudgier texture!
Serving Suggestions & Pairings
Reese’s Peanut Butter Earthquake is best served warm or at room temperature. Pair it with a scoop of vanilla ice cream or generous dollops of whipped cream to complement the chocolatey, peanut buttery goodness. It’s perfect for birthday parties, potlucks, or even as a cozy dessert for movie nights with family. Top it off with chocolate syrup drizzle for an extra touch of indulgence!
Nutritional Information
A standard serving of Reese’s Peanut Butter Earthquake contains approximately 350-450 calories, depending on portion size and serving style. It’s essential to balance indulgent treats like this with healthier meal options throughout the day. While this dessert is rich, enjoying it in moderation can certainly fit into a balanced diet.
Storing Tips & Variations
To store your leftover Reese’s Peanut Butter Earthquake, let it cool completely, then cover it with plastic wrap or transfer it to an airtight container. It can be stored at room temperature for 1-2 days or in the refrigerator for up to a week. For longer storage, consider freezing cut pieces in an airtight, freezer-safe container, where it can last for up to three months. When ready to enjoy, simply thaw at room temperature or warm it briefly in the microwave. You can also create variations by incorporating different flavors like white chocolate or butterscotch chips or adding fruit toppings for a fruity twist.
Conclusion
Reese’s Peanut Butter Earthquake is not just a dessert but a heartfelt treat that brings everyone together. Its easy preparation and sensational flavors make it a must-try for anyone who appreciates delicious baked goods. We encourage you to whip up this comforting recipe and share your delicious results with friends and family. Your kitchen will be filled with happy memories and sweet aromas!
FAQs
1. Can I make this recipe gluten-free?
Absolutely! You can substitute the chocolate cake mix with a gluten-free version, and the other ingredients remain the same.
2. How do I know when it’s done baking?
The edges of the cake should be set and firm, while the center may still appear slightly soft but not runny. A toothpick inserted into the middle should come out with moist crumbs, but not wet batter.
3. Can I use a different nut butter instead of peanut butter?
Yes! Almond butter or cashew butter would work well. Just keep in mind that the flavor will change slightly, but it will still be delicious.
4. How can I make it more chocolatey?
Incorporate chocolate pudding mix into the cake batter or increase the amount of semi-sweet chocolate chips used in the recipe for an extra chocolate punch!
5. Is it possible to make it dairy-free?
Certainly! You can use dairy-free cream cheese and plant-based butter, along with a dairy-free chocolate cake mix and dairy-free chocolate chips, to cater to a dairy-free diet.
Enjoy your baking adventure with Reese’s Peanut Butter Earthquake and let the sweet indulgence take your taste buds on a delightful journey!

Reese's Peanut Butter Earthquake
Ingredients
For the chocolate cake
- 1 box chocolate cake mix The foundation of this dish, with its rich cocoa flavor.
- 3 large eggs Essential for binding and adding moisture.
- 1/2 cup oil Provides the cake with a tender crumb.
- 1 cup water Helps in achieving the right cake batter consistency.
For the peanut butter cream layer
- 120 g melted butter Adds a luxurious richness to the overall flavor profile.
- 225 g softened cream cheese Infuses the dish with a creamy texture and tangy taste.
- 125 g creamy peanut butter The star of the show, adding a nutty, velvety smooth flavor.
- 2.5 ml vanilla extract Enhances the sweet aromas in the dish.
- 500 g powdered sugar Sweetens the cream cheese mixture, giving it the perfect consistency.
For the toppings
- 90 g semi-sweet chocolate chips Contributes delightful bursts of chocolatey goodness.
- 180 g mini peanut butter cups, halved Provides delightful pockets of peanut butter goodness.
Instructions
Preparation
- Preheat your oven to 175°C (350°F) and lightly grease a 23 x 33 cm glass baking dish.
- In a large mixing bowl, mix the chocolate cake batter according to package instructions, incorporating the specified water, oil, and eggs. Pour evenly into the prepared baking dish.
- In another bowl, beat together the softened cream cheese and melted butter until smooth. Add the creamy peanut butter and vanilla extract, mixing until combined.
- Gradually blend in powdered sugar until the mixture is thick and creamy.
Assembly
- Distribute spoonfuls of the peanut butter cream mixture across the surface of the chocolate batter.
- Scatter the semi-sweet chocolate chips and halved mini peanut butter cups over the top.
Baking
- Bake for 45 to 55 minutes, or until edges are set and the top is cracked. Allow to cool slightly before serving.