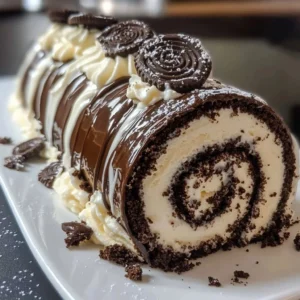
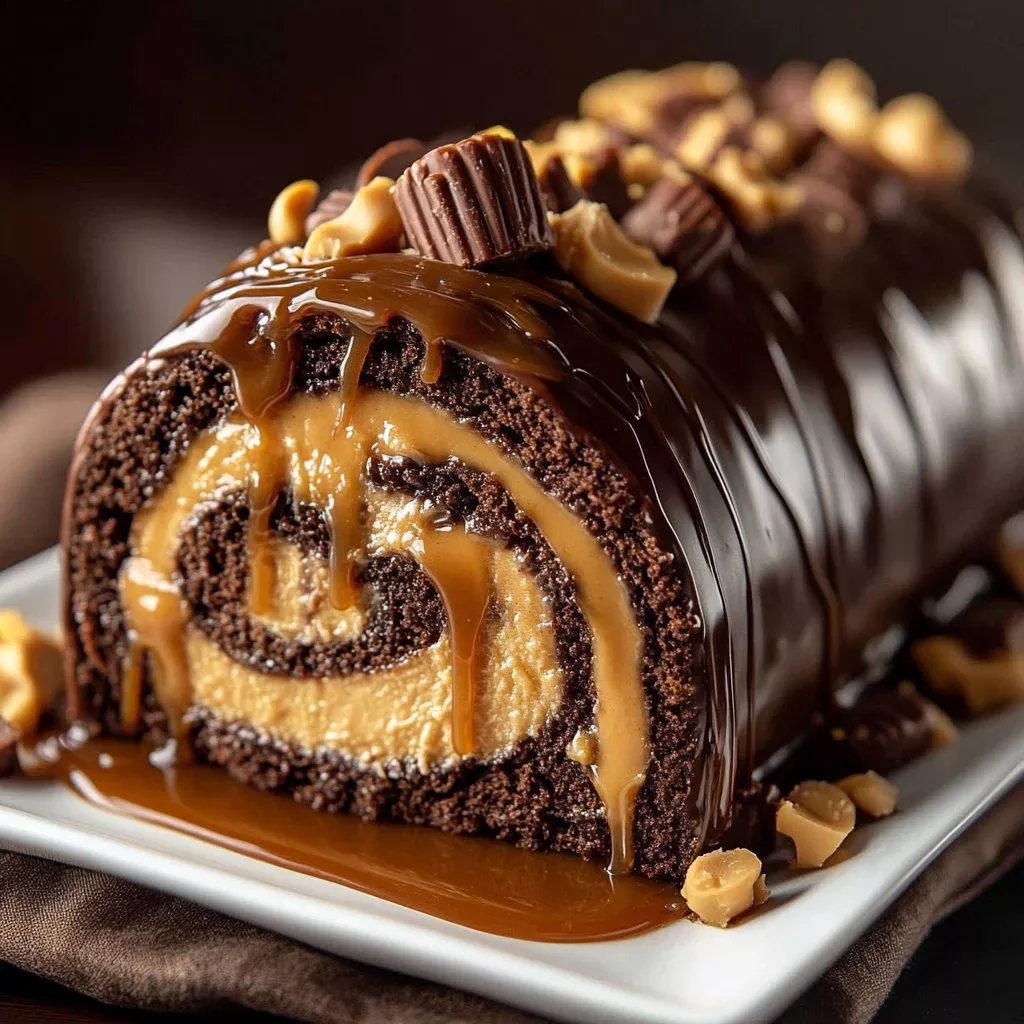
Peanut Butter Cup Chocolate Roll is a delightful dessert that combines rich chocolate flavors with the creamy embrace of peanut butter, evoking a deep sense of nostalgia and comfort. This recipe is a wonderful way to treat your family or friends to something truly special, highlighting the perfect balance of sweetness and indulgence. Imagine cutting into this beautiful roll, revealing layers of fluffy chocolate cake rolled around a velvety peanut butter filling, and topped with creamy chocolate—a treat that is as pleasing to the eye as it is to the palate. Additionally, this step-by-step recipe is simple enough for anyone to follow, making it accessible even for beginner bakers.
In this decadent dessert, the combination of the cake’s soft texture with the rich filling offers a mouthwatering experience. The addition of mini peanut butter cups brings a delightful crunch that elevates each bite, making it a perfect choice for birthdays, celebrations, or just when you want a sweet pick-me-up. Now, let’s dive into creating this delightful treat.
Ingredients
For the Peanut Butter Cup Chocolate Roll, you’ll need the following ingredients that bring this dessert to life:
- 3 large eggs: These provide structure and moisture, giving the cake its tender bite.
- 3/4 cup granulated sugar: This adds the perfect level of sweetness to our chocolate cake.
- 1/4 cup whole milk: Creamy and rich, it adds moisture to the batter.
- 1 teaspoon vanilla extract: This aromatic addition enhances the cake’s flavor profile.
- 1/2 cup all-purpose flour: A staple that helps bind the ingredients together.
- 1/4 cup unsweetened cocoa powder: Rich and dark, it infuses the cake with intense chocolate flavor.
- 1 teaspoon baking powder: This leavening agent ensures the cake rises beautifully.
- 1/4 teaspoon salt: A pinch enhances the overall flavor.
- 8 ounces cream cheese, softened: Provides a smooth and creamy filling that’s irresistible.
- 3/4 cup creamy peanut butter: Luxuriantly smooth, this is the star of the filling.
- 1 cup powdered sugar: This creates a sweet, fluffy texture that complements the filling.
- 1 teaspoon vanilla extract (for the filling): This adds depth to the peanut butter taste.
- 2 tablespoons heavy cream: Ensures a silky-smooth frosting.
- 3/4 cup semi-sweet chocolate chips: These melt and create a luscious topping.
- 1/4 cup heavy cream (for the topping): This lightens up the chocolate for drizzling.
- 6 mini peanut butter cups, chopped: To sprinkle on top, adding a delightful crunch.
Cooking Time & Tips for Peanut Butter Cup Chocolate Roll
Creating the Peanut Butter Cup Chocolate Roll can be a quick endeavor if you follow the right steps. The total cooking time is about 1 hour, with active preparation taking around 30 minutes and baking an additional 10 to 12 minutes. If you’re in a hurry, you can make the filling while the cake is baking to save time.
Here are some practical tips for success:
- Make sure your ingredients, especially the cream cheese, are at room temperature to ensure a smooth filling.
- Don’t overmix the batter; gently folding in the dry ingredients preserves the cake’s light texture.
- Ensure your cake is completely cooled before attempting to roll it; this prevents cracking.
- Use a clean kitchen towel dusted with cocoa powder to help roll the cake without sticking.
Step-by-Step Directions

- Preheat the oven to 350°F (175°C) and line a 10×15-inch jelly roll pan with parchment paper for easy release.
- In a large mixing bowl, beat the eggs and granulated sugar together until the mixture is pale, thick, and fluffy—a process that usually takes about 5 minutes.
- Gradually mix in the whole milk and vanilla extract until combined, ensuring a stronger flavor base.
- In a separate bowl, whisk together the all-purpose flour, cocoa powder, baking powder, and salt until well mixed.
- Gently fold the dry ingredients into the wet mixture with a spatula or wooden spoon, just until no streaks remain; avoid overmixing to keep the batter light.
- Spread the batter evenly in the prepared pan and bake for 10 to 12 minutes, or until the cake springs back when lightly touched.
- Once baked, turn the warm cake onto a clean kitchen towel dusted lightly with cocoa powder or powdered sugar. Carefully peel off the parchment paper and roll the cake up gently with the towel, starting from one short end. Let it cool completely while rolled.
- In the meantime, beat the softened cream cheese and peanut butter together in a mixing bowl until smooth. Gradually mix in the powdered sugar, vanilla extract, and the 2 tablespoons of heavy cream until the filling is light and fluffy.
- Once the cake is completely cool, carefully unroll it. Spread the creamy peanut butter filling evenly over the surface, and then roll it back up tightly.
- To prepare the chocolate topping, heat the semi-sweet chocolate chips and 1/4 cup of heavy cream over low heat or in the microwave until melted and smooth. Drizzle or spread this chocolate mixture over the rolled cake.
- Sprinkle the chopped mini peanut butter cups on top of the chocolate layer and let the roll chill in the refrigerator for at least 30 minutes before slicing.
Serving Suggestions & Occasions
This delightful dessert is perfect for a variety of occasions. Whether you’re celebrating a birthday, hosting a family gathering, or simply enjoying a cozy night in, the Peanut Butter Cup Chocolate Roll is a crowd-pleaser. Serve it with a dollop of whipped cream or a scoop of vanilla ice cream to enhance the overall indulgence. It also pairs beautifully with a hot cup of coffee or tea, making it an ideal dessert for afternoon gatherings.
Common Mistakes for Peanut Butter Cup Chocolate Roll
When making the Peanut Butter Cup Chocolate Roll, there are a few common pitfalls to avoid:
- Overbaking the cake can lead to dryness; keep an eye on it during the last few minutes.
- Forgetting to dust your towel can cause the cake to stick, making it difficult to roll.
- Not allowing the cake to cool completely before rolling can lead to cracks in the final product.
- Skipping the chilling step after decorating might result in a messy presentation when slicing.
Healthier Alternatives & Variations
If you’re looking to make adjustments to the Peanut Butter Cup Chocolate Roll, here are a few healthier alternatives:
- Use almond flour instead of all-purpose flour for a gluten-free option.
- Substitute the granulated sugar with coconut sugar or a sugar substitute like stevia or erythritol for a lower-calorie treat.
- Try using natural peanut butter with no added sugar or oils for a healthier filling.
- For a lighter version, use Greek yogurt instead of cream cheese in the filling.
- Add a layer of fruit, like sliced bananas or strawberries, for a fresh twist.
FAQs
Can I make the Peanut Butter Cup Chocolate Roll ahead of time?
Yes, you can prepare the cake a day in advance and fill it before serving to keep it fresh.How should I store leftovers?
Wrap the rolled cake in plastic wrap and store it in the refrigerator for up to 3 days.Can I freeze the Peanut Butter Cup Chocolate Roll?
Yes, you can freeze it for up to 2 months. Wrap it tightly in plastic wrap and foil before freezing.Is there a substitute for heavy cream?
You can use half-and-half or a non-dairy milk alternative, though the consistency may differ.Can I use crunchy peanut butter instead of creamy?
Absolutely! Crunchy peanut butter will add a delightful texture to your filling.What can I serve with this dessert?
Vanilla ice cream, whipped cream, or even a drizzle of caramel sauce would complement it nicely.
Conclusion
Now that you’ve learned how to make this decadent Peanut Butter Cup Chocolate Roll, it’s time to roll up those sleeves and give it a try! With its rich chocolatey goodness and creamy peanut butter filling, this dessert promises an explosion of flavors that will surely impress. Gather your ingredients, follow the step-by-step directions, and delight your family and friends with this scrumptious treat that they won’t soon forget!